What is the Intent of my Photography?
Not a day goes by that someone doesn’t ask me for a photography tip. Whether it’s to critique an image, help them with settings, or giving a lens recommendation, it seems that photography is always on everyone’s minds.
One of the tips I give to people is to think about your intentions before you even pick up your camera. What are you trying to portray in your photographs?
Are you taking pictures of your family? Then your intentions might be to capture frame-worthy photos.
Traveling? Then your intentions might be to catch the scenery and landscapes.
Photographing food? Then your intention might be to capture a photo that will go nuts on Pinterest.
For each of these instances, your intent will be different — either to help guide your subjects into natural poses, use your focus to capture your surroundings, or to find texture and color in your photos.

Whatever you do, make sure you know your intention before picking your camera. Knowing the technical and compositional elements for your photos will come naturally once you decide what your end result will be. Before shooting, get a general idea as to what settings to start with. Then, you can tweak them along the way to develop the composition of your photographs.
Get into the habit of thinking about the intent of your photographs and you will notice how the composition of your images improves.
Let’s take a look at few scenarios to help you grasp this concept. In each of these situations, I am going to walk you through my thoughts. Welcome to my crazy world!
1. I am headed on vacation and want to capture the sunsets.
I have thing about capturing sunsets when I am on vacation. Last week, while we were vacationing in Deep Creek, Maryland I captured amazing sunsets. You could go one of two ways when capturing the sunsets: silhouettes or landscapes. Personally, I prefer to grab a great silhouette. I feel it enhances the colors of the sky and gives your viewer something to focus on. To do this, you need to focus on your object (in my case, the fishing pole). You then need to meter for the sky, meaning you want the sky to be bright and your focal point dark.

Camera: Nikon D7000
Aperture: ƒ/4.5
Shutter Speed: 1/125 sec
ISO: 160
Lens: 35 mm
2. I am a new mom and I want to make sure I capture all the tiny details.
Newborn photography is hands-down my favorite. I love how in control I can be when it comes to composition and how I can really focus on my intentions. Do I want to capture the tiny toes, ears, and nose? Do I want to capture them sleeping? Having a plan helps you know what to do and when to do it. If you want capture all the little details, then you know you want to work with a large aperture (small f/). This will help zero in on what you are capturing (i.e., nose, ear, fingers, etc.). It will also help you pull in all the available light. I try to always avoid using any kind of flash with babies.
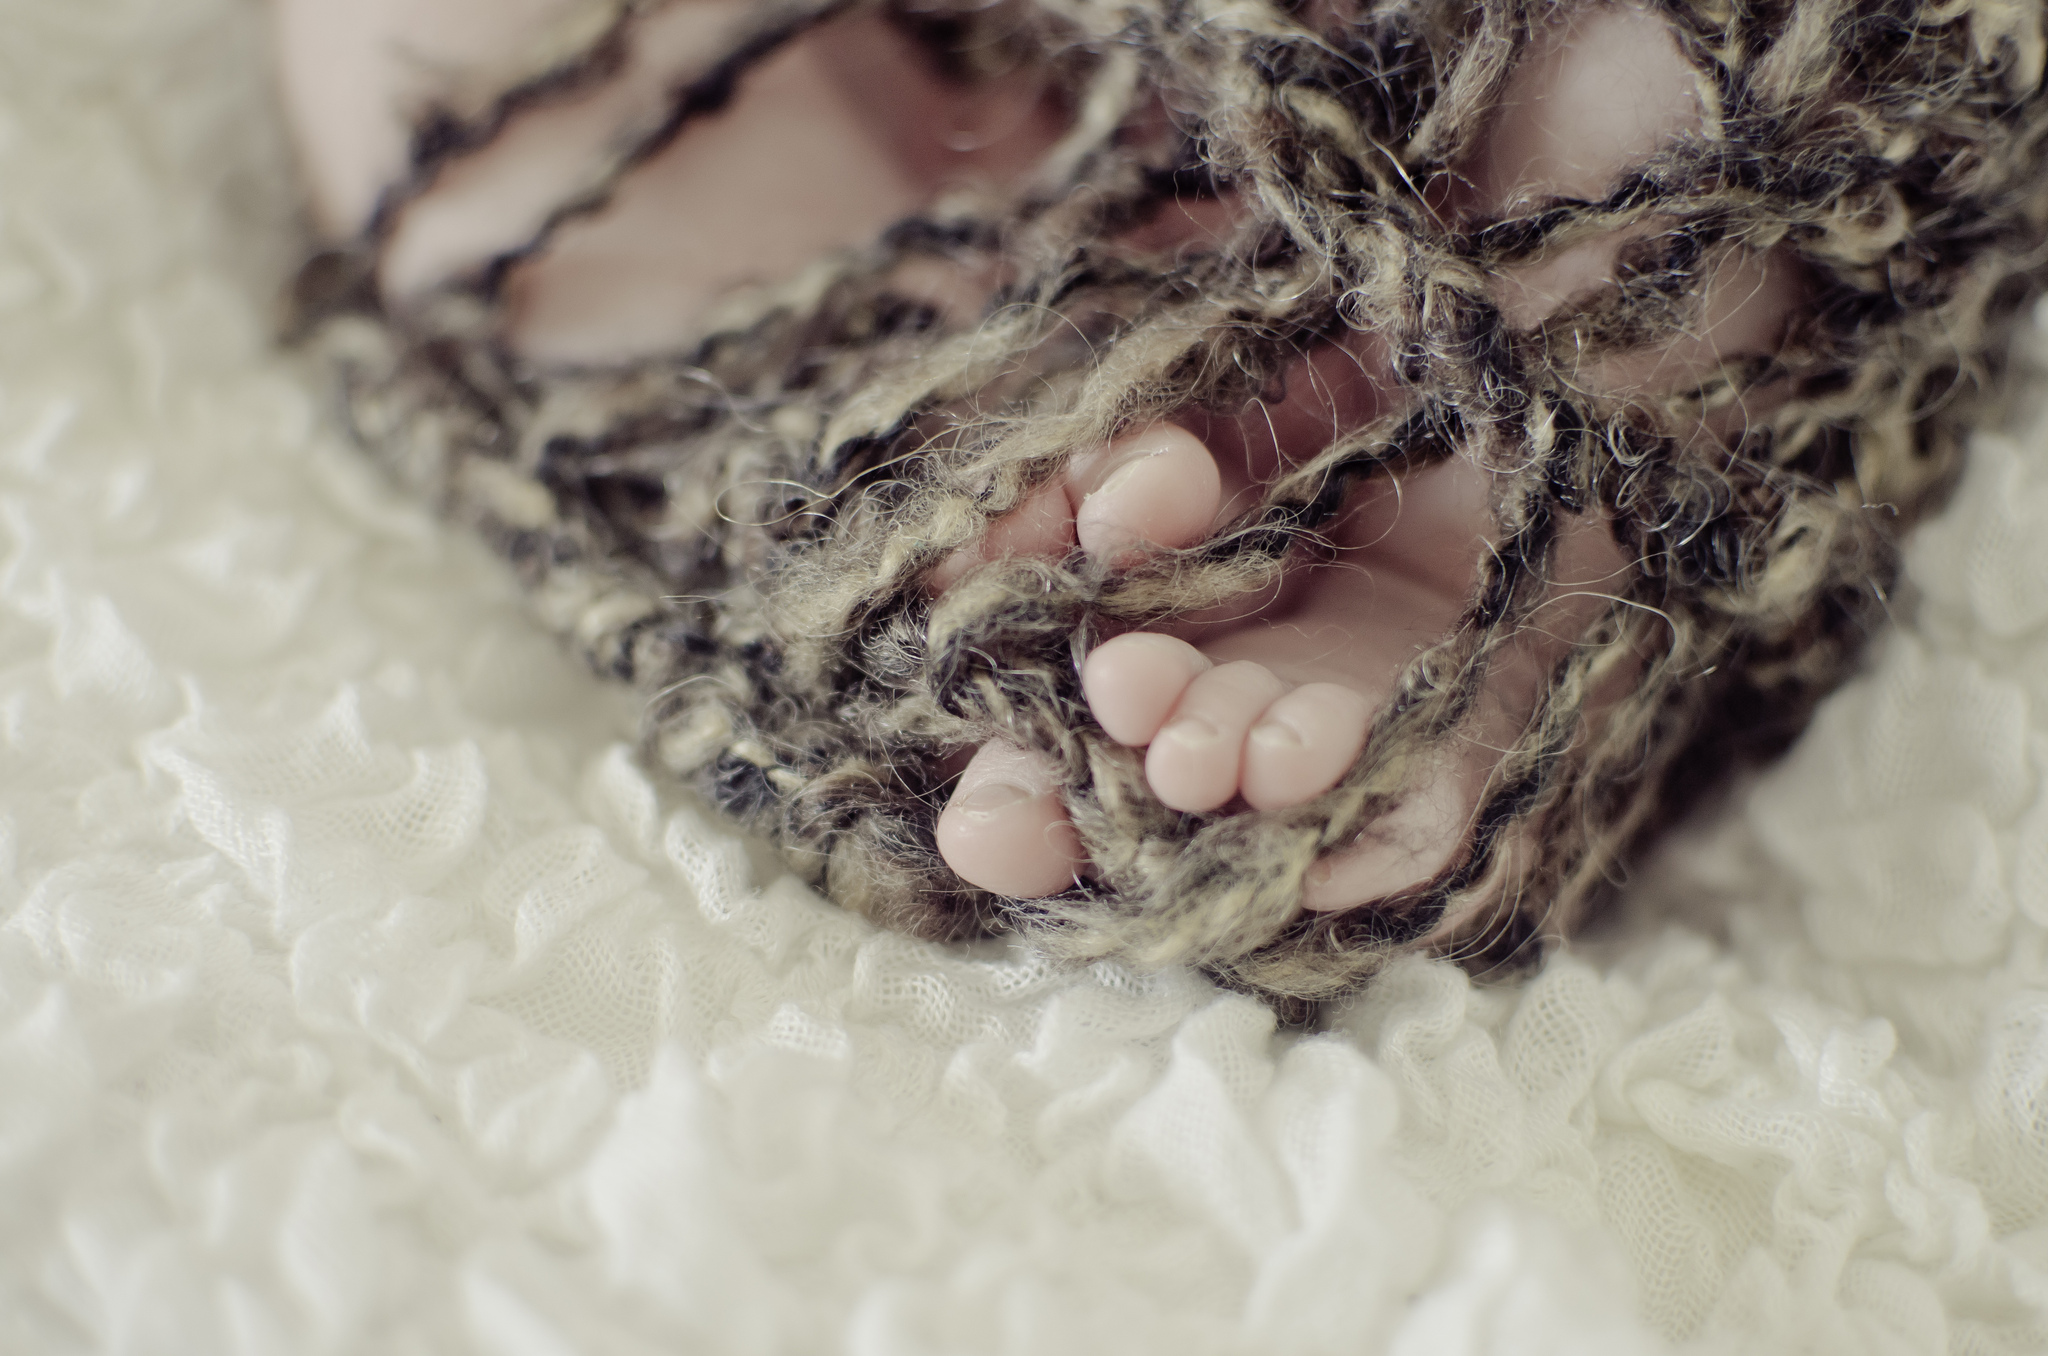
Camera: Nikon D7000
Aperture: ƒ/2.2
Shutter Speed: 1/100 sec
ISO: 250
Lens: 35 mm
3. I want to freeze motion with some awesome motion blur.
This is a really fun technique when capturing moving objects. You can use it with a car, a runner, a fountain, just about anything that is moving. You want to set your shutter so that it’s fairly slow. Next, focus on the object you are trying to capture. As that object starts to move, you want to pan with it while taking the photo. Make sure you are standing really still. Use your hips to swivel the top half of your body and keep your feet planted firmly on the ground.

Camera: Nikon D7000
Aperture: ƒ/13
Shutter Speed: 1/15 sec
ISO: 125
Lens: 35 mm
4. My house is a cave. We don’t have any natural light but I want to take pictures indoors.
Every time I walk into a client’s home, I walk in blind. I have no idea what the lighting will be like in their homes. You may feel like your home is a cave but, trust me, there is light somewhere. You just have to find it! Most of the time, the light is somewhere you wouldn’t expect it. I’ve done sessions in the kitchen, in the bathroom, and by the front door. Sometimes just opening up the front door allows a ton of light into the room. Another favorite spot of mine is in front of sliding doors. If you want to get really tricky, you can bounce the light onto your subject with a reflector. And, you don’t need a fancy reflector, anything white will do like a piece of paper or poster board. You can even cover a piece of cardboard with tin foil as well!
As for settings, I know I am going to have to use a faster shutter speed and wider aperture (small f/). I also may bump my ISO if my images are too blurry with the fast shutter speed. I try not to go over an ISO of 800 because then my images will be too grainy. If you are still having problems with lighting, then you made need to bust out your flash, whether it’s your pop-up flash or an external flash.
Here is a set-up I use a lot in my food photography. Bay windows are great if you have them!

I have a piece of white foam board on the bottom and one off to the side to use as a reflector. This helped me have some great all-around lighting and eliminated shadows. Here is the final photo.

Camera: Nikon D7000
Aperture: ƒ/2.8
Shutter Speed: 1/100 sec
ISO: 200
Lens: 35 mm
Have a photography struggle? Leave it in the comments and it may be answered in my next post! In the meantime, check out my past photography tips and tutorials to hold you over.